
Making Food from Friends at Ho...
Hi and welcome to a new video covering 5 Friends themed recipes - all made vegan! Joey's Meatball Sub, a Phoebe friendly lasagna,...

Whhaaaaaaatup What up guys So today i m going to show you how to hand stitch a patch So get your embroidery backing cloth fabric and your image along with hoop and your embroidery floss next put your image under the backing and begin to trace it I want the reverse image of my drawing so what I did is I flipped the backing around and put my cloth on top Now take your hoop Place the smaller one underneath and begin to loosen the top one you ll want it loose enough so you can place it over the cloth and the smaller hoop Now pull on the edges of the cloth so it gets tight like a drum I started with yellow because that will be the majority of the patch s color You can turn on the light on on your phone and put that underneath so you can see where your image is your going to make your fist stitch from the bottom tie a knot at the end of your string and then come back on top I like to start where the very top of the yellow will be and work my way down from there with a bunch of horizontal stitches Just line by line starting from right coming up from the back then coming in from the top on the left side I found that things ran a whole lot smoother if you cut of your excess string from that very first stitch you made If you run out of string or you are done with your first color You re going to cut it and your going to split that sting in to two separate stands its made out of 6 lil strings so its going to be 3 and 3 you take one of the 3 s and sew it under the last stitch you made and then proceed to make a square knot left over right and right over left And again cut off any extra string So to do the next colors just do like you did the first tie a knot at the end of your sting and come in through the back and just layer it on there top to bottom So rather than going horizontal for lines on the crust i did vertical ones Just to change things up once you get all your colors finished your going to add in your lines you start this like any other to fill in the line in this patch what you are going to do is your going to come from the back a little bit ahead of where you want your line to end then go down through the front where you want it to start and your just going g to keep on doing this over and over again till you have all those lines filled in Once you get that done remove your hoops you can now tear away that backing this is where i messed up i shouldn t cut it out yet i should actually add first your iron on adhesive but its still going to work cut out piece of your heat bond roughly the size of your patch the heat bond has a rough side and a smooth side your going to place the rough side against the back of your patch i put a piece of cloth over my patch to protect my iron from the places that i accidentally out out when ironing on your heat bond be sure to get all the creases and the front and the back here i took off the cloth that i had on top that was protecting my iron but after you have your heat bond your going to want to cut out your patch your going to want to get pretty close about 1 8 of cloth around the entire patch You can remove the wax paper from the heat bond Next add a little bit of glue to stop it from fraying add a dab of glue around the entire edge of the patch once its dry you are ready for the last step adding the outside line start from the back and pull up where you think you would go back around and come up again from the back you don t you are going to make the next stitch from the top going down any extra sting you have from the first stitch you can sew right around it covering it up mine was pretty long so i did end up cutting it off now you re going to want to work your way around the entire patching working side by side making things as close as possible that way no cloth underneath will be shown you end it just like any other one split it in half 3 and 3 take one of those sew it through and tie a square knot cut off any excess and vuala you have your patch place it where you was it and your done Looks good This is my Amazon Associate links with the brands I use but really you can get the supplies almost anywhere Follow me and watch the art process Like Comment Share or what ever
Hi and welcome to a new video covering 5 Friends themed recipes - all made vegan! Joey's Meatball Sub, a Phoebe friendly lasagna,...
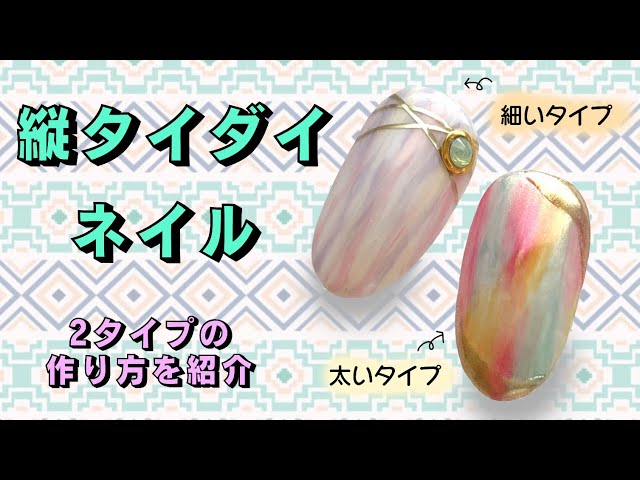
太いバージョンと細いバージョンの縦タイダイを 2本立てで紹介します。
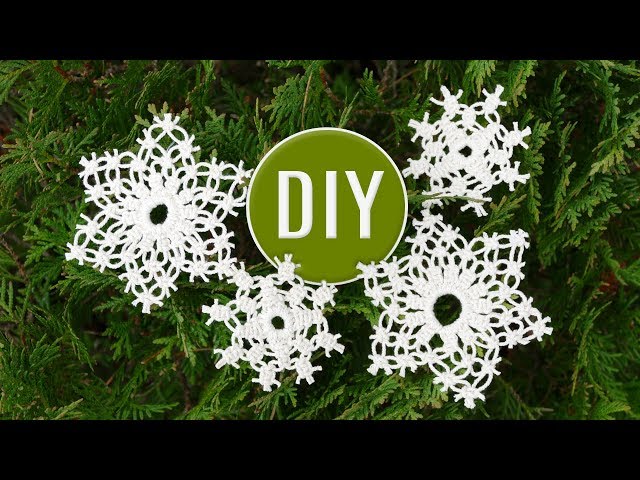
DIY EASY Macrame Christmas Snowflake Ornament | 2 Patterns For Beginners with Square Knot. Holiday crafts & decoration ideas by Ma...
Why not try my Cookie Cream Pie too - https://youtu.be/dXQnpcijLz0 Subscribe to my channel! - https://www.youtube.com/CupcakeJemma...


Read more about Linda's look here: http://into.gl/lindas-lips
➤看上次洗澡與其他崩潰精華 ☑上回洗澡崩潰慘樣:https://ppt.cc/fS2jXx

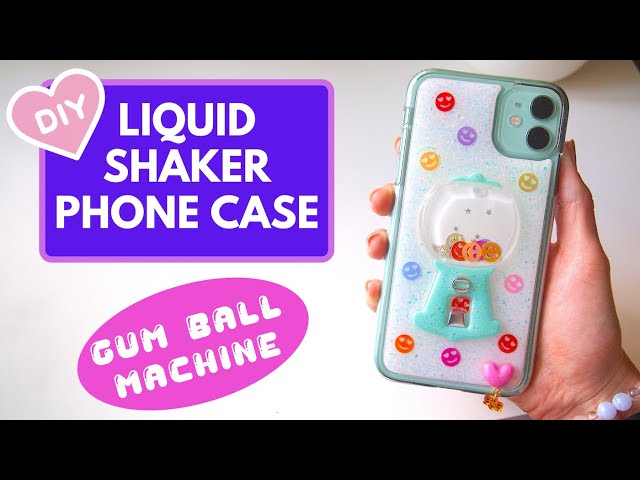
Hi everyone! Watch me make this liquid shaker phone case using a gum ball machine shaker resin mold! Do you prefer liquid shaker o...
for more information about DeMuse Doll please kindly visit www.nigelchia.com


パンダくんとくまさんクッキー♪ | The Cutest Teddy Bear & Panda Cookies
スックから5月1日に発売される夏コレクション「LADYISH NEON」を紹介レビュー!ネオンカラーの色展開が夏らしくとっても可愛いです🌺どのアイテムもSUQQUらしく肌馴染みが良く、大人っぽい印象になる絶妙な発色で、とても使いやすいものばかりです!限定発売の...


In this video I have invited a special guest...my stitchy friend Kristie from Crosshatch Quilts is here and we are showi...

How to paint dandelions using starbucks paper cup / Acrylic Painting Techniques - JayLee ❖ Jay Lee is a painting youtube...

こんにちは、こんばんは!樹(いつき)です♪今日の動画の推しポイントは『アルミホイルを踏んだ時のぴーちゃんの足プルプル』です!ぜひ、注目して見てみてください😜🙏

あまり体型について言及することはありませんでしたが、私が激太りしたこと皆様気がついていたと思います。これからは胸を張って今の自分から逃げずに発信したいと思いました。ちょっと怖くて全身を映したりしていなかったのですが、徐々にコーデも紹介したい...
![BJD Levi Ackerman [Attack on Titan] Box Opening / Unboxing](https://i.ytimg.com/vi/fi1ysk_Sdpg/mqdefault.jpg)
I got my hands on a Levi BJD! :) I felt it was the perfect timing since season 4 is the last season! What I really loved...

ケイトから2/1に発売の「ケイト パーツリサイズシャドウ」は新発想のアイシャドウ! 下まぶたに重点をおいたアイシャドウで、ほほの余白が埋まり小顔印象が際立つ顔に仕上がりに👀 でか目と小顔が一気に叶えられる理想的なアイシャドウなんです💡 カラ...

たっくさんリクエスト頂いているので、金曜日にアップしようと思っていた #スック の新作アイシャドウ #シグニチャカラーアイズ のレビューを本日アップしますー♪ てへ♡とりあえず月曜日、頑張ったぜ今日も俺たち、、、なっ!ってテンションで ご覧...

안녕하세요. 조꽁드입니다. 이 영상을 시작으로 4편의 크림치즈 디저트 레시피를 올릴 예정입니다. 주식회사 동서가 새로이 선보이는 독일산 필라델피아 크림치즈 제품을 제공받아 레시피 영상을 제작 하게 되었습니다. (유...
Copyright © 2017 - All Rights Reserved - www.ichaowu.com

