
【簡単料理】おつまみ一品☆豚カクテキ簡単美味しいおかずにもO...
修正版です。 ☞ Find ME SNS ☜ …fav items https://room.rakuten.co.jp/us0g1/
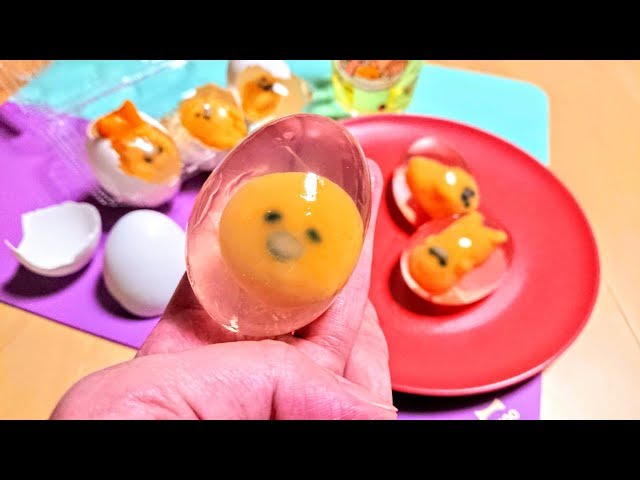
We made a Gudetama jelly using real egg shells There were a few moments along the way it looked like it wasn t going to work out but we somehow made it in the end Take a look Recipe First prepare the eggs1 Crack open 6 eggs LL size this time and remove the insides 2 Wash shells well 3 Sterilise with boiling water 4 Dry thoroughly Next we make the shiratama5 Add 100g of rice flour 10g of pumpkin flakes and 130g of silken tofu on this occasion we used 140g and knead them into the mixture 6 To make the right colour for Gudetama we add orange food colouring 3 times with a toothpick and knead the mix again Then we wrap the mixture to prevent drying 7 Now we take another 10g of rice flour and mix it with 13g of silken tofu and knead together to make a white batter Then we again wrap this mixture to prevent drying 8 Now we use these two mixtures to make the shape of Gudetama The eyes and mouth are applied by toothpick using black food colouring 9 Boil in water Once the shiratama has floated to the service continue to boil for one more minute 10 Place in cold water until the heat fades to prevent sticking when you then place it on top of the baking sheet Now we can make two types of jelly11 First gelatin jelly Add 40g of sugar and 4g of gelatin power to 200g of boiling water and mix thoroughly to create the liquid gelatin 12 Next there s agar jelly Add 25g of sugar and 6g of agar into a saucepan and mix well Then gradually mix in 200g of water taking care to avoid creating lumps Next heat the saucepan until just as the water starts to boil to create the liquid agar jelly 13 Place the Gudetama from step 10 into the eggs from step 4 then pour in the liquid jelly To make sure Gudetama is in the dead centre of the eggs we inserted 10 dried cellophane noodles with the ends bent downwards propped up with clothespins which kept it from sinking into the jelly 14 Cool for 3 4 hours in the freezer 15 Once nice and soft pull out the cellophane noodles and remove them from the shell If you use jelly made from gelatin powder you end up with a softer consistency that starts to melt after a few hours at room temperature Agar jelly results in a firmer consistency a certain degree of transparency and also maintains its shape at room temperature Make whichever Gudetama you d like best For the eggs placed in the gelatin jelly only we lightly coated the insides with salad oil 本物の卵の殻にぐでたまのゼリー作りました 途中 何度かめげそうになりましたが 最後までなんとかたどり着きました ご覧ください レシピ 型にする卵のからの準備をします1 卵 今回 LLサイズ 6個に穴を開け中身を取り出す 2 よく洗う 3 沸騰したお湯で煮沸消毒する 4 乾かしておく 白玉作ります5 白玉粉 100g かぼちゃフレーク 10gに絹ごし豆腐 130g 今回は140g を様子を見ながら加えこねる 6 ぐでたま色にするためにオレンジの食用色素加え 爪楊枝で3回 こねる 乾かないようにラップをかける 7 白玉粉 10gに絹ごし豆腐 13gを加えこね 白色の生地も作る 乾かないようにラップをかける 8 2と3でぐでたまの形を作る 目と口は黒の食用色素で爪楊枝を使って描きました 9 沸騰した湯で茹でる 白玉が浮いてきてから1分茹でると茹で上がり 10 冷水にとり 粗熱がとれたらオーブンシートの上に並べるとくっつきにくい 2種類のゼリーを作ります 11 ゼラチンゼリー熱湯 200gに砂糖 40g 粉ゼラチン 4gを混ぜ ゼリー液を作る 12 アガーゼリー鍋に砂糖 25g アガー 6g混ぜる 水 200gをダマにならないように少しずつ加え混ぜる 火にかけ 沸騰手前で火を止め ゼリー液を作る 13 4に10を入れ 11と12を注ぐ ぐでたまを卵の真ん中にするために 乾燥春雨の先端を折り曲げたものを10に差し込み 洗濯ばさみで支え ゼリー液に沈んでしまわないようにしました 14 冷蔵庫で2 3時間冷やす 15 柔らかくなった乾燥春雨を切り取り 殻から取り出す 粉ゼラチンゼリーの方が質感が柔らかく 時間が経つと室温で溶け出す アガーゼリーはしっかりとした質感で透明度も高く室温でも形状を保てる お好みのぐでたまをお楽しみください ゼラチンゼリーを入れた卵の方だけ 内側にサラダ油を薄く塗りました ぐでたま Gudetama OddlySatisfying ASMR Eggs Recipe
修正版です。 ☞ Find ME SNS ☜ …fav items https://room.rakuten.co.jp/us0g1/
ダイソンから新しく発売されたコテで髪の毛を巻いてみた。


謝謝大家收看, 今天分享的單品細節都在下方⇩⇩請點開看⇩⇩
Check out and try not laugh at this video! Subscribe http://bit.ly/FunnyPetMedia for weekly videos!


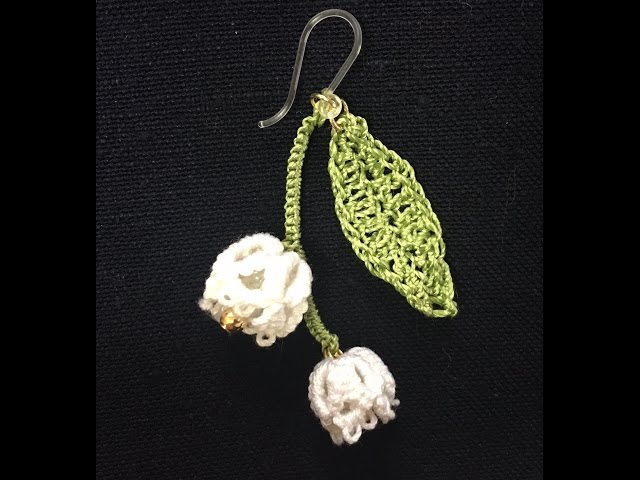
雖然我想嘗試,直到山谷百合解釋的季節,它現在已經成為。沒有中間的人可愛的造型,日子不好過。它是為那些誰開始針梭織視頻https://youtu.be/camQG6oYzfI

Below is the details of products I used in this video : 1. Urban Decay Eyeshadow Primer Potion - Eden 2. Urban Decay Naked Palett...
チーズとろ〜り!のび〜るマッシュポテト


字幕や翻訳の作成に協力頂けるととても嬉しいです。 よろしくお願いします✨ http://www.youtube.com/timedtext_cs_panel?c=UC2Ou9n3S5uOFiNKXS1UpxNQ&tab=2
このチャンネルでは毎日18時半に動画を投稿しています!


In this video I have invited a special guest...my stitchy friend Kristie from Crosshatch Quilts is here and we are showi...

How to paint dandelions using starbucks paper cup / Acrylic Painting Techniques - JayLee ❖ Jay Lee is a painting youtube...

こんにちは、こんばんは!樹(いつき)です♪今日の動画の推しポイントは『アルミホイルを踏んだ時のぴーちゃんの足プルプル』です!ぜひ、注目して見てみてください😜🙏

あまり体型について言及することはありませんでしたが、私が激太りしたこと皆様気がついていたと思います。これからは胸を張って今の自分から逃げずに発信したいと思いました。ちょっと怖くて全身を映したりしていなかったのですが、徐々にコーデも紹介したい...
![BJD Levi Ackerman [Attack on Titan] Box Opening / Unboxing](https://i.ytimg.com/vi/fi1ysk_Sdpg/mqdefault.jpg)
I got my hands on a Levi BJD! :) I felt it was the perfect timing since season 4 is the last season! What I really loved...

ケイトから2/1に発売の「ケイト パーツリサイズシャドウ」は新発想のアイシャドウ! 下まぶたに重点をおいたアイシャドウで、ほほの余白が埋まり小顔印象が際立つ顔に仕上がりに👀 でか目と小顔が一気に叶えられる理想的なアイシャドウなんです💡 カラ...

たっくさんリクエスト頂いているので、金曜日にアップしようと思っていた #スック の新作アイシャドウ #シグニチャカラーアイズ のレビューを本日アップしますー♪ てへ♡とりあえず月曜日、頑張ったぜ今日も俺たち、、、なっ!ってテンションで ご覧...

안녕하세요. 조꽁드입니다. 이 영상을 시작으로 4편의 크림치즈 디저트 레시피를 올릴 예정입니다. 주식회사 동서가 새로이 선보이는 독일산 필라델피아 크림치즈 제품을 제공받아 레시피 영상을 제작 하게 되었습니다. (유...

Copyright © 2017 - All Rights Reserved - www.ichaowu.com

